Important Notes about Roland's Compact Flash File Naming Conventions |
|
When you save a *.td0 file on your PC using VDrumLib, you can use any name that makes it easy for you to remember the contents of the backup. But, the TD-20 will NOT display this filename on its LCD. Instead, the TD-20 uses a "display name" that is contained inside the *.td0 backup file. So, to make it easy to match the PC filename to the TD-20 display name, VDrumLib automatically embeds the first 12 characters of the PC filename into the *.td0 file as the "display name" for the TD-20 to use.
However, when it comes time to transfer your *.td0 backup file to your PC via the compact flash card, you will need to rename the files on your compact flash card so that the TD-20 can identify the backup type and backup number of the file. The following file naming convention is used by the TD-20 to identify the backup type and backup number.
File naming convention for Expanded TD-20 (TD-20X
or TD-20 with a TDW-20 card):
- General file name fromat: TDW2BK##.TD0
- “TDW2” indicates the backup is for an expanded TD-20.
- The “BK##” identifies the Backup Number, where ## is a number from 01 through 99.
- Example: TDW2BK01.TD0 is the file name for backup #1, while TDW2BK99.TD0 is the file name for backup #99.
File naming convention for Unexpanded TD-20 (without TDW-20)
- General file name fromat: TD20BK##.TD0
- “TD20” indicates the backup is for a non-expanded TD-20.
- The “BK##” identifies the Backup Number, where ## is a number from 01 through 08.
- Example: TD20BK01.TD0 is the file name for backup #1, while TD20BK08.TD0 is the file name for backup #8.
|
| |
Step
1: Save Your Kit Library And Change The Backup Name Displayed Of Your TD-20 |
|
VDrumLib can save TD-20 kit backups in two different file formats (1) .syx, and (2) .TD0. However, ONLY .TD0 files can be transferred via a Compact Flash Card. To save your kits to the .TD0 file format, you MUST also copy the setup info from at least one other .TD0 backup file. If you have already copied this setup info to your new kit library, then it will appear at the top of the kit list as indicated in the circled item in the picture below. If you have this info, you can now save a .TD0 file.
If you haven't copied the setup info, yet, then you need to open a .TD0 file that contains a backup of your own personal trigger settings. When you open the .TD0 file, the first item in the list will not be a drum kit. Instead, it will be labeled TD-20 Setup Info, and it will have the TD0 file extension listed in the kit number column. To copy this info, just select it by clicking on it with your mouse, then click the ADD button -- just like copying a drum kit. |
| |
Once you have copied both the kit data and the "Setup Info" to your new kit library, you can then save the new library to a *.td0 file on your hard drive. To save your new library, simply press the Save button which is located directly below the "New Library" selection list. You will be prompted with a standard Windows "Save As" dialog box to choose a name and location to save your new *.td0 kit library.
Specifying The Backup Displayed On Your TD-20 LCD: The first 12 characters of the file name will be embedded into the *.td0, so that it will appear on your TD-20 LCD screen when you load it from the compact flash. So, if you use a descriptive name when you save the file from VDrumLib, then the TD-20 LCD name will be the same as the filename that you see on your PC. However, when you copy the file from your PC to your compact flash card, you must rename the file that resides on your compact flash card to match the Roland file naming convention described at the top of this page. But, do NOT rename the file on your PC's hard drive! Rename ONLY the copy on your compact flash card.
WARNING: The last character of the .TD0 extension is a ZERO, not a capital or uppercase o! If you use an upper case o, instead of a 0, then your TD-20 will not recognize the file. To make things easier, VDrumLib will automatically append the .TD0 file extension to the file name if you don't type in an extension, or if you type in an invalid extension.
|
| |
Step
2: Transfer Your New Kit Backups To Your Compact Flash Card |
|
If you properly formatted your Compact Flash Card on your TD-20 module, then when you insert your Compact Flash Card into your computer's card reader slot, it will look like a hard drive named "Roland TD20". In addition, it will contain a folder named "ROLAND". The "ROLAND" folder will contain another folder named "TD". This ROLAND/TD/ directory is the ONLY location that the TD-20 will load backup files from. For this reason, you MUST copy the .TD0 files that you created with VDrumLib into the "TD" folder. If you copy the files to any other folder, then your TD-20 will NOT be able to locate the files.
Furthermore, the name of the files is also critical (please read the file naming convention at the top of this page.) If you do not follow the Roland file naming convention, then your TD-20 will NOT be able to locate the files. So, it is important that you also rename the copies of the files after you copy them to the "TD" folder.
|
| |
|
| |
Step
3: Insert Compact Flash Card Into Module |
|
Find the TD-20 Compact Flash Card Slot located at the front
of the TD-20 (see picture below). Insert the card all the way
into the card slot until it is firmly in place. Be sure to insert
the card with the "connector end" facing towards the module. |
 |
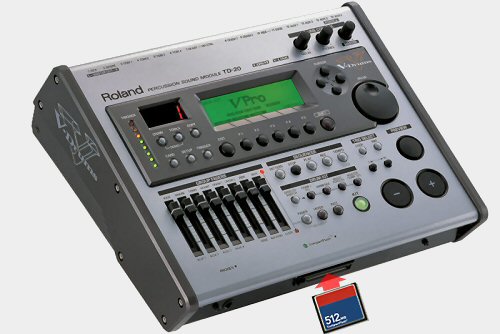
NOTE: The TD-20 only supports 3.3 Volt Compact Flash
Cards with a capacities from 16MB to 512MB. Also, the TD-20 only allows
you to save a maximum of 8 backups, at less than 300 KBytes each. So, a 512MB card will NOT allow you to save any more backups than a 16MB
card, and therefore, you don't need to buy a larger card if this is all that
you will use your card for. Your TD-20 owners manual also has instructions for using
a Compact Flash Card -- these instructions begin on page 70 of the TD-20 owners manual.
|
|
Step
4: Press The Card Button To Access The Card Menu |
|
After inserting the card into the card slot, press the CARD button located on the front panel of the TD-20, just above
the group fader sliders (see photo below). The "Compact Flash
Indicator" will light up and CARD MENU screen will appear. |
| |
|
|
Step
5: Load Backup From Your Compact Flash Card Into TD-20 |
|
To transfer your new backup to your TD-20, press the F2 button to choose the LOAD option from the CARD MENU. |
| |
|
|
Step
6: Choose Which Backup To Load From Your Compact Flash Card |
|
Choose the backup that you want to load from the list of available backups on your Compact Flash Card. Use the [+/-] buttons or the [VALUE] dial to scroll through the list of available backup files. Then, press the F5 button to load the selected backup. |
| |
NOTE: If the backup was created with VDrumLib, the backup names shown on the TD-20 LCD are the first 12 characters of the file name that you chose when VDrumLib saved the backup. This is because VDrumLib also embeds the file name into the .td0 file so that the TD-20 can display it even if you rename the file on the Compact Flash Card.
|
| |